
This week has been a busy one for me. I decided to learn how to screencast. Screencasting, or screen recording, is producing a video file (or live streaming) that contains an image of what is on your computer screen (in my case a Mac, iPad, or iPhone), along with vocal narration. Sometimes authors also include a video of them narrating as well.
Screencasting is often used for educational purposes, such as teaching how to use an App. It allows you to narrate how to use app features, while at the same time showing your computer screen and demonstrating what you’re talking about. It’s also used to produce narrated videos of Keynote or Powerpoint presentations that can be used for education.
Why Do I Want to Learn Screencasting?
I want to learn screencasting because I want to be able to produce professional-looking videos in which I explain and illustrate how to use Apps. I want to use these videos in presentations that I give to my community Mac/iOS club. I also want to use them in articles in this blog.
Next Friday I’m giving a presentation to the Mac/iOS club on how to use iMovie. Rather than using just Keynote slides with a bit of animation (my usual method), I want to raise the bar by embedding screencasting videos illustrating and teaching how to take an iMovie project from start to finish on the iPad.

Screencasting Applications
In order to have editing capabilities and produce professional results, it’s helpful to have an app that’s specifically designed for video editing & screen recording. The two big contenders for use in screencasting are Camtasia, by TechSmith, and ScreenFlow, by Telestream. My first inclination was to go back to using Camtasia. I used Camtasia years ago to produce keynote video presentations to send to prospective clients for my estate planning practice. However, when I looked up the app, it had gotten quite expensive over the years, and now sells for $299.
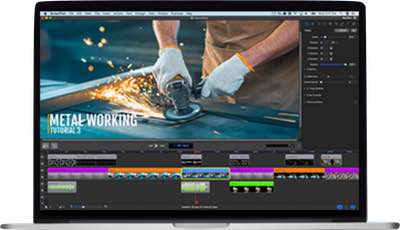
ScreenFlow is very popular with screencast producers. Its price is about half of Camtasia, at only $149. I opted to purchase ScreenFlow, and haven’t been disappointed.
I chose ScreenFlow over Camtasia.
I learned the basics of how to use the app by watching the videos and tutorials provided by TechSmith. I also watched some tutorials by independent producers on YouTube.
In ScreenFlow, you can choose what to record during any given session. You can record audio from the source you choose, and video from the source you choose. You can record them in separate sessions and put them together in editing, or both at the same time. You can also record video from a camera at the same time if you’d like to include a small video of you narrating.

Microphone
I knew that the built-in microphone on my computer would be inadequate for producing professional-sounding quality audio. After reading a number of reviews, I decided to buy the Blue Yeti USB Microphone for $99 on Amazon.
The microphone was very easy to set up, plugging into the back of my Mac with a USB A plug. ScreenFlow recognized it immediately. It includes options for plugging in a headset, a mute button, different recording modes, and a dial for increasing or decreasing gain. More than adequate for my screencasting needs. And I like the sound of my voice in the recordings it produces.
What Process Should I Use in Recording and Editing?
After assembling my basic tools, I started to research the process of how to produce screencasts. There are two basic approaches:
- Record the audio narration and screen video at the same time; or
- Record the audio narration first, then record the screen video and mesh the two tracks together in editing.
It would seem like the simplest approach would be to record the audio and video together, but my first attempts didn’t turn out so well. Either I would mess up the audio, or mess up the video, or typically, both.
For narration, most producers use a written script or an outline. I tried an outline the first couple of attempts, then decided to write a script for each video.
Next, I tried reading the script and recording the video of my iPad screen at the same time. At the same time, I also manipulated the mouse to demonstrate the points I was talking about. That went OK, but I made lots of mistakes.
Finally, I settled on recording my narration while reading from a script, then listening to the narration while recording the video of me using the mouse and my finger touch to demonstrate on my iPad. That has worked the best and saved me time editing, so I’m using that method for the rest of this project of 5 videos.
Script, outline or wing it? I chose writing a script and recording audio first, then recording video to match the audio narration.
Perhaps after I become more comfortable with screencasting I can go back to recording the video of my screen and audio at the same time, using only an outline. That’s what I did years ago.